
Setting up NotesRSS is designed to be simple and intuitive. Your account consists of two main pages that work together to transform your Evernote notes into automated social media content. Here’s how everything works:
Your Account: The Foundation
Your Account Page is where everything begins. This is your control center for connecting Evernote and configuring your blog settings.
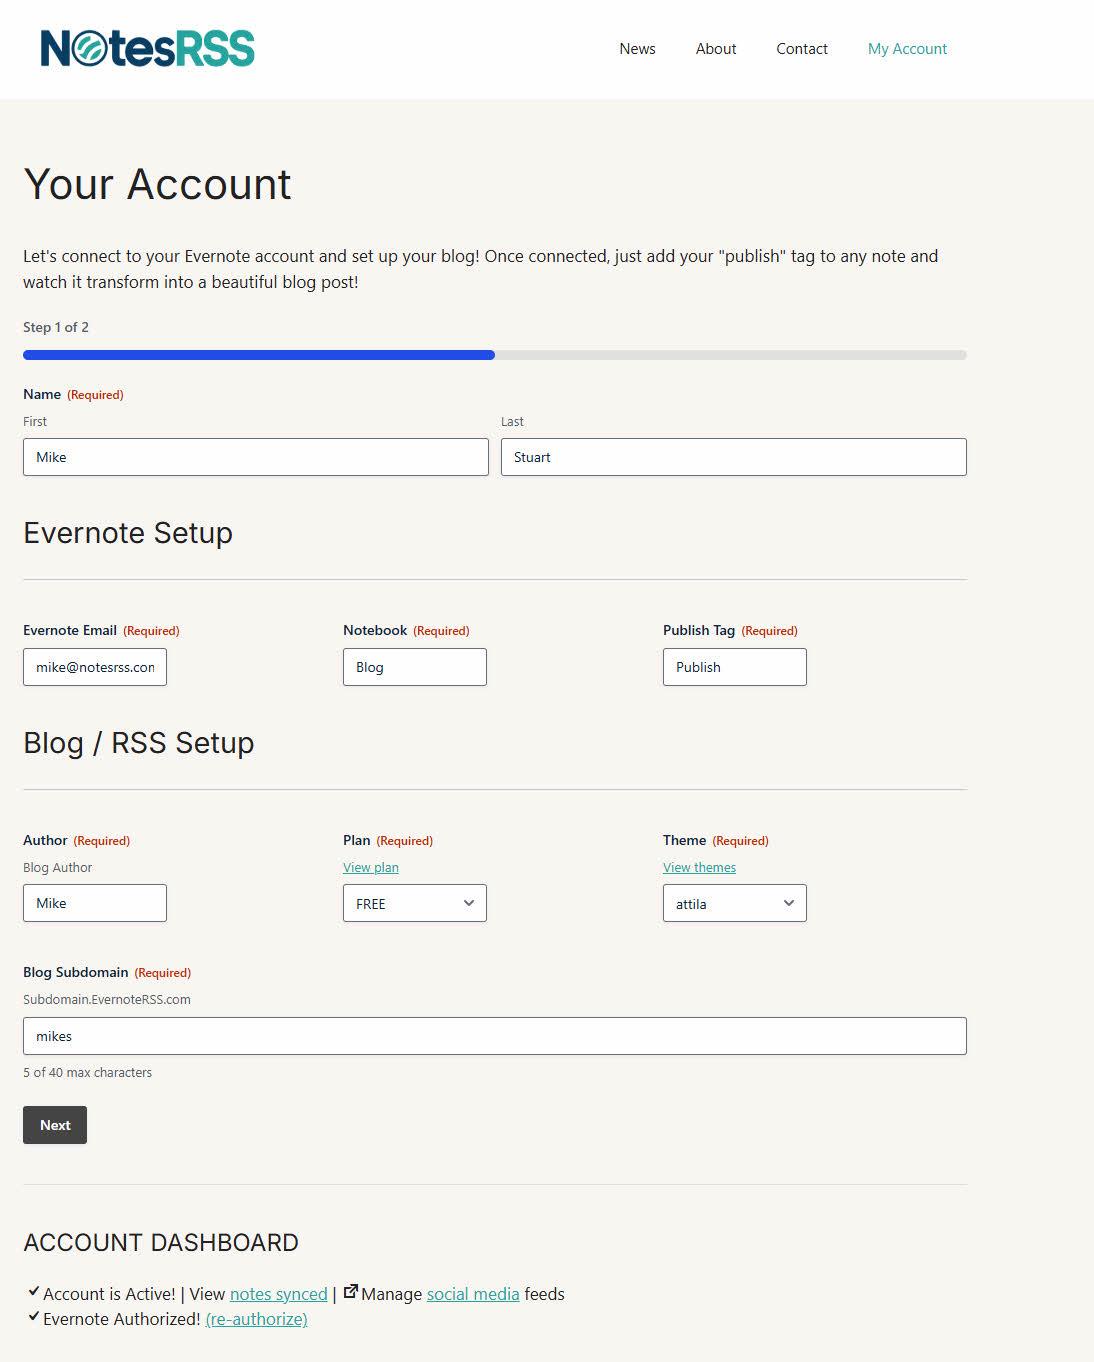
What You’ll Configure:
- Personal Information: Your name and basic account details
- Evernote Setup: Email, notebook, and publish tag settings
- Blog/RSS Setup: Author details, plan selection, theme, and subdomain
The Magic Happens Here:
Once you complete the initial setup, you’ll see the Account Dashboard below the form. This dashboard shows your connection status:
✅ Account is Active with links to view your synced notes
✅ Evernote Authorized with your authorization status
After Evernote authorization, you’ll see a “Manage social media feeds” link that takes you to the next step, plus a “View notes synced” link to monitor your last 50 Evernote synchronizations.
Your Social Feeds: Amplify Your Reach
The Social Feeds Page is where the real automation magic happens. This page allows you to broadcast your blog content across all your social media platforms automatically.
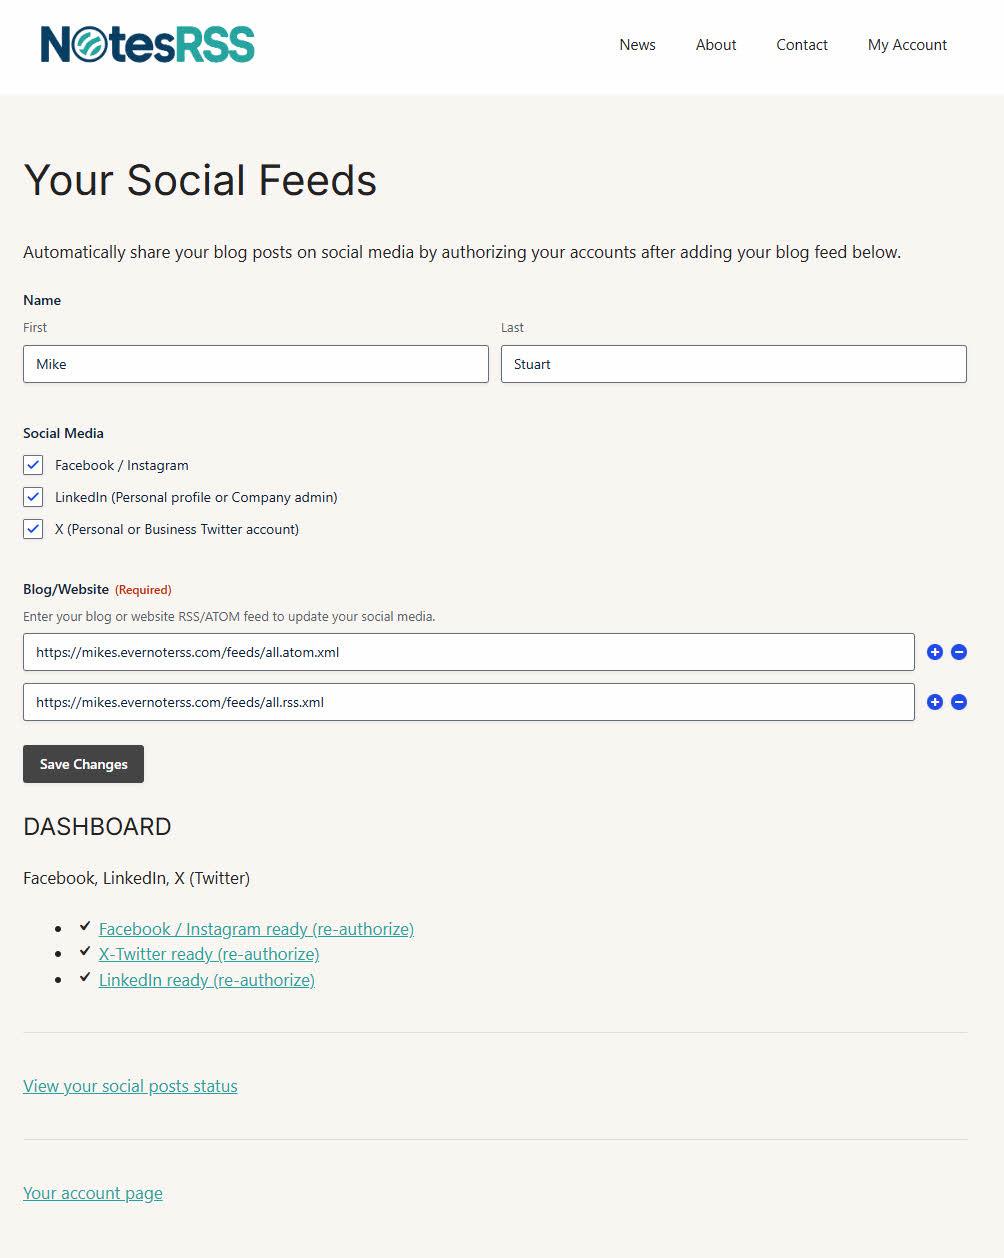
Setting Up Social Media:
- Choose Your Platforms: Select from Facebook/Instagram, LinkedIn, and Twitter/X
- RSS Feed Configuration: Use your default NotesRSS feed or add additional RSS sources
- Multiple Feed Support: Add other blogs or websites to cross-post content
The Social Dashboard:
Below the form, you’ll find the Social Dashboard showing the authorization status for each platform:
✅ Facebook/Instagram ready (re-authorize)
✅ LinkedIn ready (re-authorize)
✅ X-Twitter ready (re-authorize)
✅ Reddit ready (re-authorize)
Once you have active social connections, you’ll see a “View your social posts status” link to monitor your last 50 social media posts and their success status.
The Authorization Process
We use secure OAuth authorization to connect your social media accounts. This process ensures your passwords remain private and secure. When you click any authorization link, you’ll follow our simple 3-step process:
- Click to Connect – Start the authorization from your NotesRSS dashboard
- Login Safely – Log into the external service (Evernote, Facebook, LinkedIn, etc.) using your normal credentials
- Approve & Done – Grant NotesRSS permission to access your account
🔒 We never see your passwords. All authorization uses industry-standard OAuth 2.0 technology, the same secure method used by thousands of trusted applications. For a detailed walkthrough of the authorization process, visit our complete guide: Social Media Authorization
How It All Works Together
The Complete Workflow:
- Account Page: Connect Evernote and configure your blog
- Social Feeds Page: Connect social media platforms and configure RSS feeds
- Automation: Tag notes in Evernote with your “publish” tag
- Magic: Watch as your notes automatically become blog posts AND social media content
Real-Time Monitoring:
- Notes Synced: Track how your Evernote notes are processed
- Social Posts Status: Monitor successful posts across all platforms
- Re-authorization: Easy one-click re-authorization when tokens expire
Getting Started (Recap)
![]()
- Complete Your Account Setup:
Visit your Account Page first. Connect Evernote, choose your blog settings, and configure your subdomain. Once Evernote is authorized, you’ll see the dashboard with your connection status. - Configure Social Media:
Click “Manage social media feeds” to reach the Social Feeds Page. Select your desired platforms and follow the authorization process for each one. - Start Publishing:
Tag any note in Evernote with your chosen “publish” tag and watch the automation take over. Your note becomes a blog post, gets added to your RSS feed, and automatically posts to your connected social media accounts.
Your NotesRSS account is designed to be powerful yet simple. Set it up once and enjoy automated content distribution that keeps your audience engaged across all platforms!